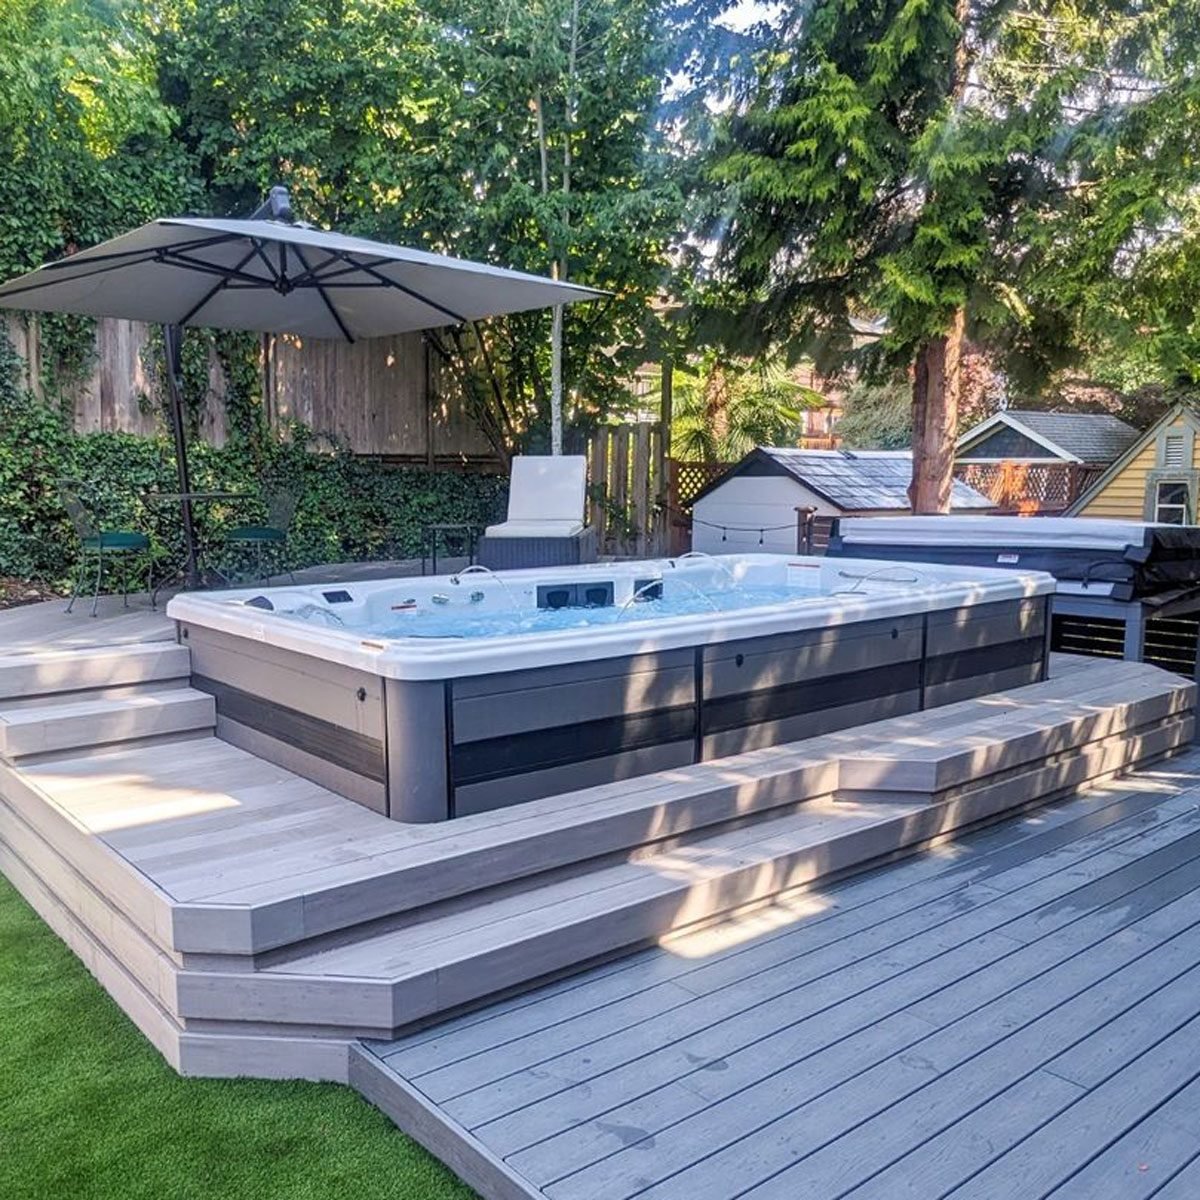
Honestly, most people treat above ground pools like a budget afterthought. They buy the kit, level some sand, and drop a ladder over the side. Then they realize they hate climbing a shaky plastic staircase every time they want a dip. That's usually when the idea of a two level deck with above ground pool enters the chat. It’s the single best way to make a $3,000 pool look like a $40,000 backyard retreat, but if you mess up the transitions between the levels, you're basically building a giant wooden tripping hazard.
Building "up" instead of just "out" changes the whole vibe. You've got one level for the grill and the dining table—dry land, basically—and then a second level that sits flush with the pool coping. It solves the biggest headache of above ground pools: that awkward, towering wall of vinyl and steel that blocks your view of the rest of the yard.
Why Two Levels Beat a Single Flat Platform
A massive, flat deck surrounding a pool often feels like a giant stage. It’s exposed. A two level deck with above ground pool creates zones. You want a place to eat where your burger doesn't get splashed by a cannonballing ten-year-old.
The lower level usually connects to the house. It's your transition zone. The upper level is the "beach." By splitting the elevation, you naturally hide the pump and filter equipment under the high side. It’s out of sight, out of mind, and—more importantly—out of the way of the lawnmower. According to the North American Deck and Railing Association (NADRA), proper ventilation around that equipment is key, so don't completely seal it off with solid skirting. You need airflow so your pump doesn't overheat in July.
Navigating the Structural Reality
Let’s get real about the weight. Water is heavy. Like, incredibly heavy. A standard 24-foot round pool holds about 13,500 gallons. That is over 110,000 pounds of water pushing against those walls.
Your deck cannot touch the pool. Never.
If your deck rests on the pool frame, the shifting weight of the water will eventually buckle the wood or, worse, collapse the pool wall. You need a gap. Usually, about a half-inch to an inch between the deck boards and the pool’s top rail is the sweet spot. This allows for the pool to expand when it's full and for the wood to swell when it rains.
For the framing, you’re looking at 6x6 posts. Don't let a contractor talk you into 4x4s for an elevated pool deck. It’s not just about downward pressure; it’s about lateral stability. When four people jump into a pool at once, that water moves. That movement creates sway. Diagonal bracing on your posts isn't optional here—it's what keeps the whole thing from feeling like a bowl of Jell-O when you walk on it.
Material Choices: Wood vs. Composite
Pressure-treated pine is the go-to because it’s cheap. But it splinters. If you’re walking around barefoot—which, hello, it’s a pool—those splinters are a nightmare.
Capped composite like Trex or Azek is the dream, but it gets hot. Like, "fry an egg" hot. If your backyard gets direct afternoon sun, look for "cool deck" technology in composite boards or stick to light-colored tropical hardwoods like Ipe if you have the budget of a small nation. If you stay with pressure-treated wood, you better be ready to sand and seal it every single year to keep it smooth for bare feet.
Safety and the "Invisible" Codes
Code compliance isn't just red tape; it's what keeps your neighbor's kid from falling in. Most local jurisdictions require a fence that is at least 48 inches high. When you build a two level deck with above ground pool, the deck itself often acts as part of that barrier.
You need self-closing, self-latching gates. This is non-negotiable. If the gate swings toward the pool, it’s wrong. It should always swing away so a toddler pushing on it won't accidentally stumble into the water.
Also, think about the "climbability" of your railing. If you choose horizontal cable railings because they look modern and cool, check your local laws. Some inspectors see those as a ladder for adventurous children and will fail your inspection on the spot. Stick to vertical balusters with no more than a 4-inch gap between them.
The Logistics of the Build
Start with the pool. Always.
It sounds backwards, but you cannot build the deck and then try to "drop" the pool into the hole. The pool needs to be leveled, filled, and settled before you dig a single post hole for the deck. Water pressure changes the shape of the pool slightly. If you build the deck first, you might find your pool is two inches further away from the wood than you planned once it’s actually full of water.
- Excavation and Leveling: The pool site must be laser-leveled. Not "looks flat" leveled. Use a transit.
- Pool Installation: Get the liner in and the water flowing.
- Post Layout: Now you can bring in the string lines. Build the upper level first, as it's the most critical for the pool's edge.
- The Joist Hang: Use G-Tape or joist flashing on top of your pressure-treated joists. It prevents rot where the deck boards meet the frame, which is crucial in high-moisture pool environments.
Maintenance is the Part Everyone Ignores
A deck next to a pool lives a hard life. It’s constantly being soaked in chlorine or salt water, then baked in the sun. This cycle of wetting and drying is brutal on wood fibers.
If you went with a salt-chlorine generator for your pool, be extra careful with metal fasteners. Salt air and salt spray eat standard galvanized nails for breakfast. Use 304 or 316-grade stainless steel screws. They cost more. Buy them anyway. Replacing rusted-out screws in three years is a job you will hate.
Check your ledgers. If your lower level is attached to your house, ensure the flashing is perfect. Water dripping off wet swimmers and hitting the house-to-deck connection is a recipe for rot that can destroy your home’s rim joist.
Making it Look High-End
Lighting changes everything. Don't just stick a floodlight on the back of the house.
Use low-voltage LED riser lights on the stairs between the two levels. It prevents trips at night and makes the whole setup look like a resort. Wrap the bottom of the deck in lattice? No. Lattice looks cheap. Use horizontal 1x4 boards with small gaps. It’s called "rainscreen" style siding, and it makes the base of the pool deck look like a modern architectural feature rather than an eyesore.
Actionable Next Steps
- Measure your yard's slope: A two level deck is actually easier to build on a sloped lot because it follows the natural grade.
- Call 811: Before you dig those 6x6 post holes, make sure you aren't about to slice through a gas line or your internet cable.
- Check the "Top Rail" width: Measure the top rail of the pool you plan to buy. You want your deck boards to slightly overhang the rail or sit perfectly flush. This determines your joist height.
- Budget for 20% more than you think: Lumber prices fluctuate, and deck hardware (the stuff that actually holds it together) is surprisingly expensive.
- Consult a pro on the ledger: If you're DIY-ing the rest, pay a structural engineer or a veteran carpenter for two hours of their time just to check your framing plan and house attachment. It’s the best $200 you’ll ever spend.
Building this isn't a weekend project. It’s a month-long saga. But when you’re sitting on that upper level with your feet in the water, looking down at the grill on the lower level, you’ll realize it was worth every single splinter.